
How Artie Works

A quick walkthrough for setting up your catalog — from your first login to adding a piece.

Every Artie gallery lives at its own address and opens behind a simple PIN screen — this is what your visitors see first.

1
Visiting your gallery address shows the PIN gate. Share your gallery's access PIN with anyone you want to let browse your catalog.
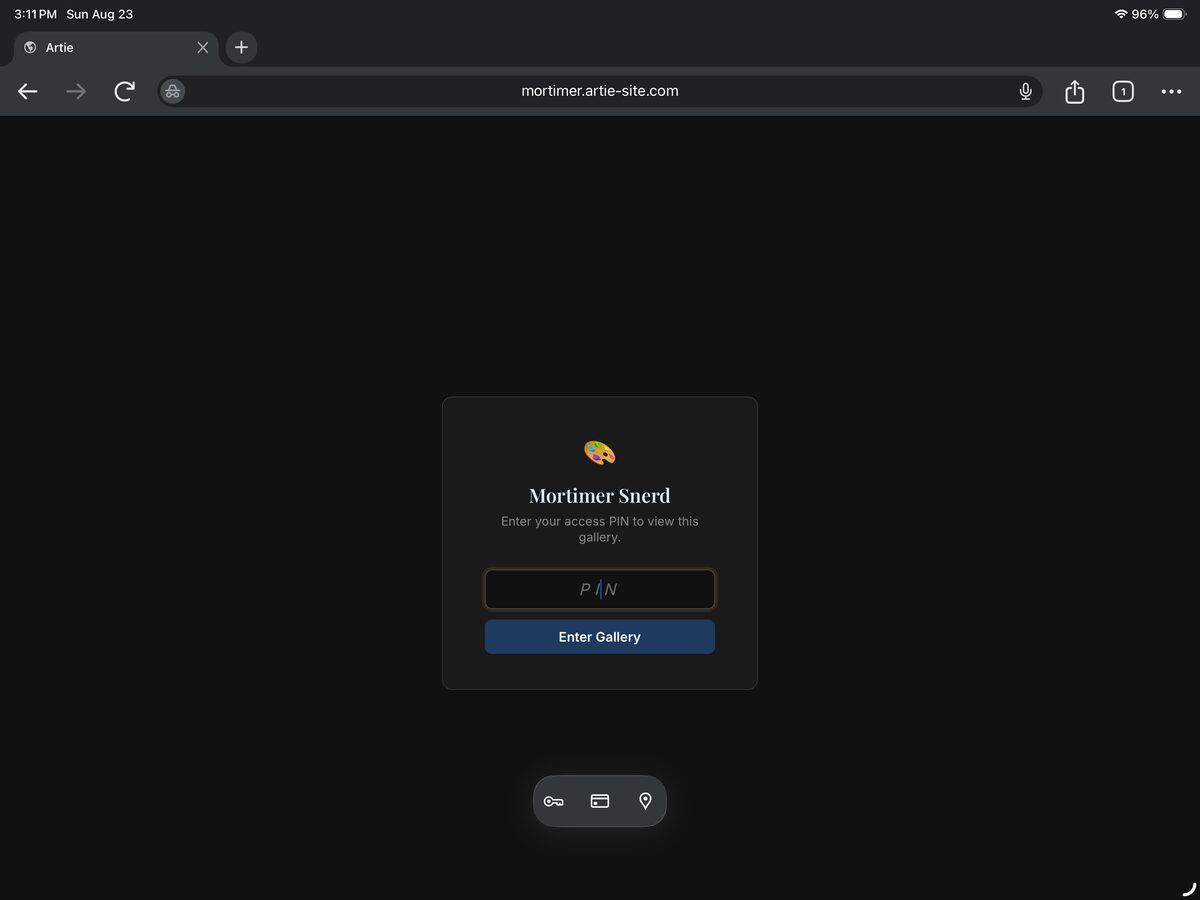
Artie PIN gate screen for the Mortimer Snerd gallery
2
Enter the PIN to unlock the gallery. It starts empty until you add artwork — the Admin button in the top right is how you log in to manage your catalog.
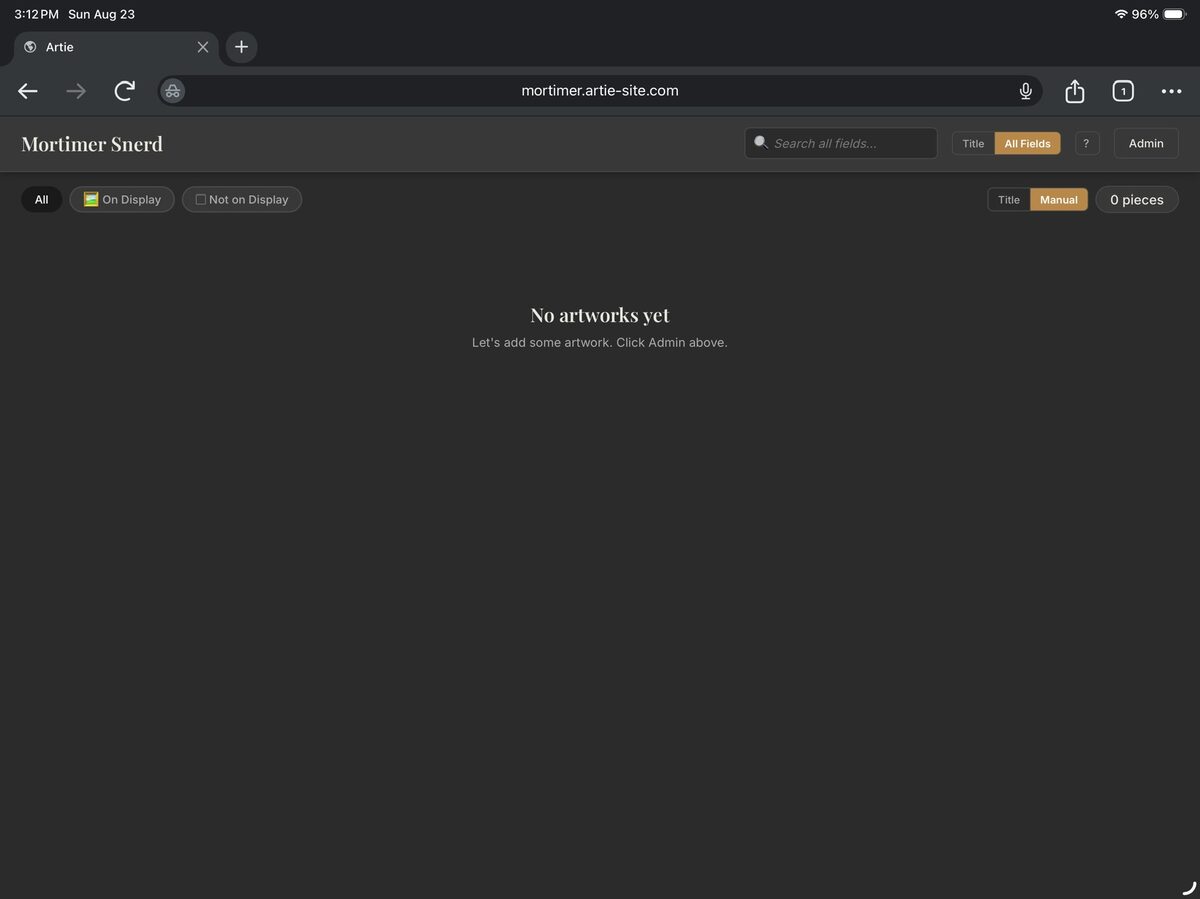
Empty Artie gallery view with the Admin button highlighted

Click Admin from the gallery view to log in and start managing your catalog.

1
Clicking Admin opens the login box, asking for your admin password.
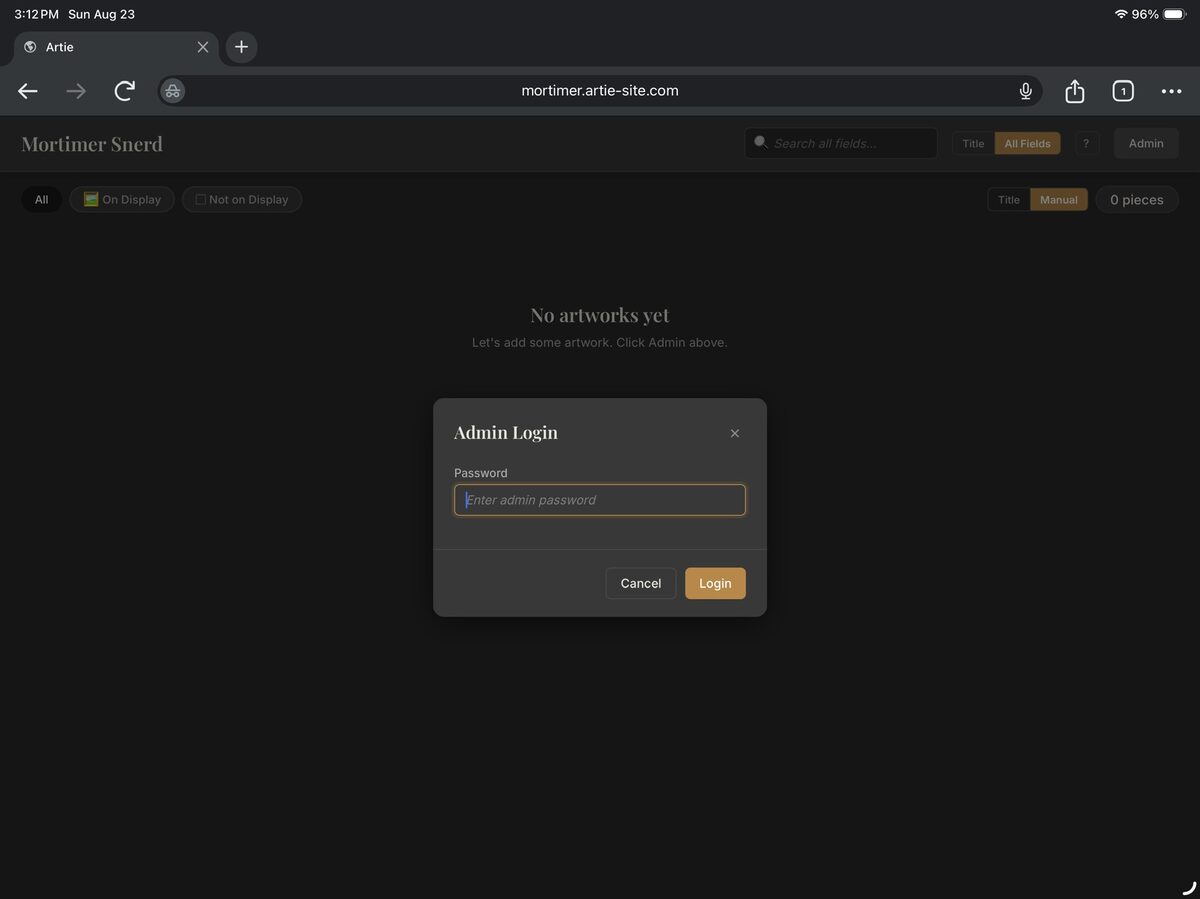
Artie Admin Login dialog with an empty password field
2
Enter your admin password and click Login.
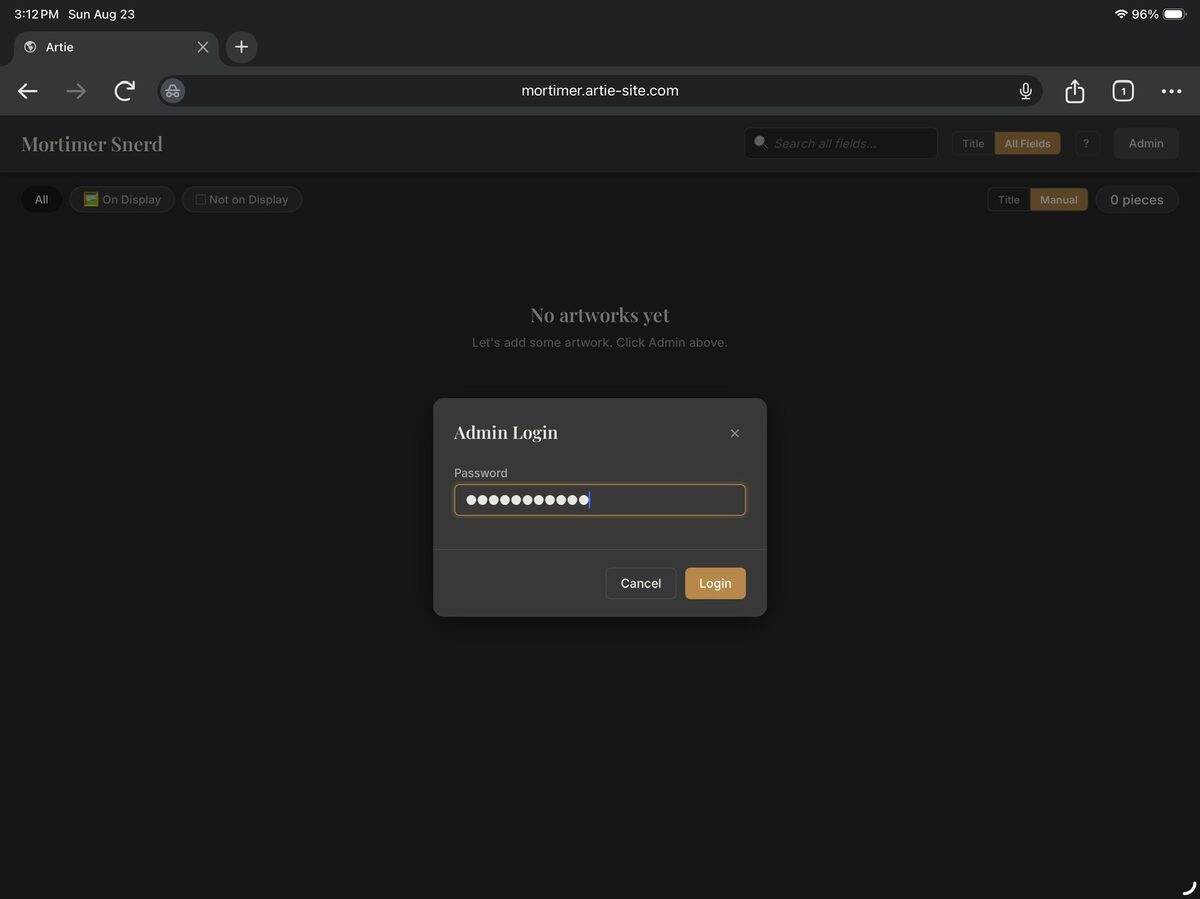
Artie Admin Login dialog with the password field filled in

The first time you log in, Artie walks you through accepting the license agreement and setting a personal password. You'll only see this once.

1
Review the License Agreement. Scroll through it to enable the Agree button.
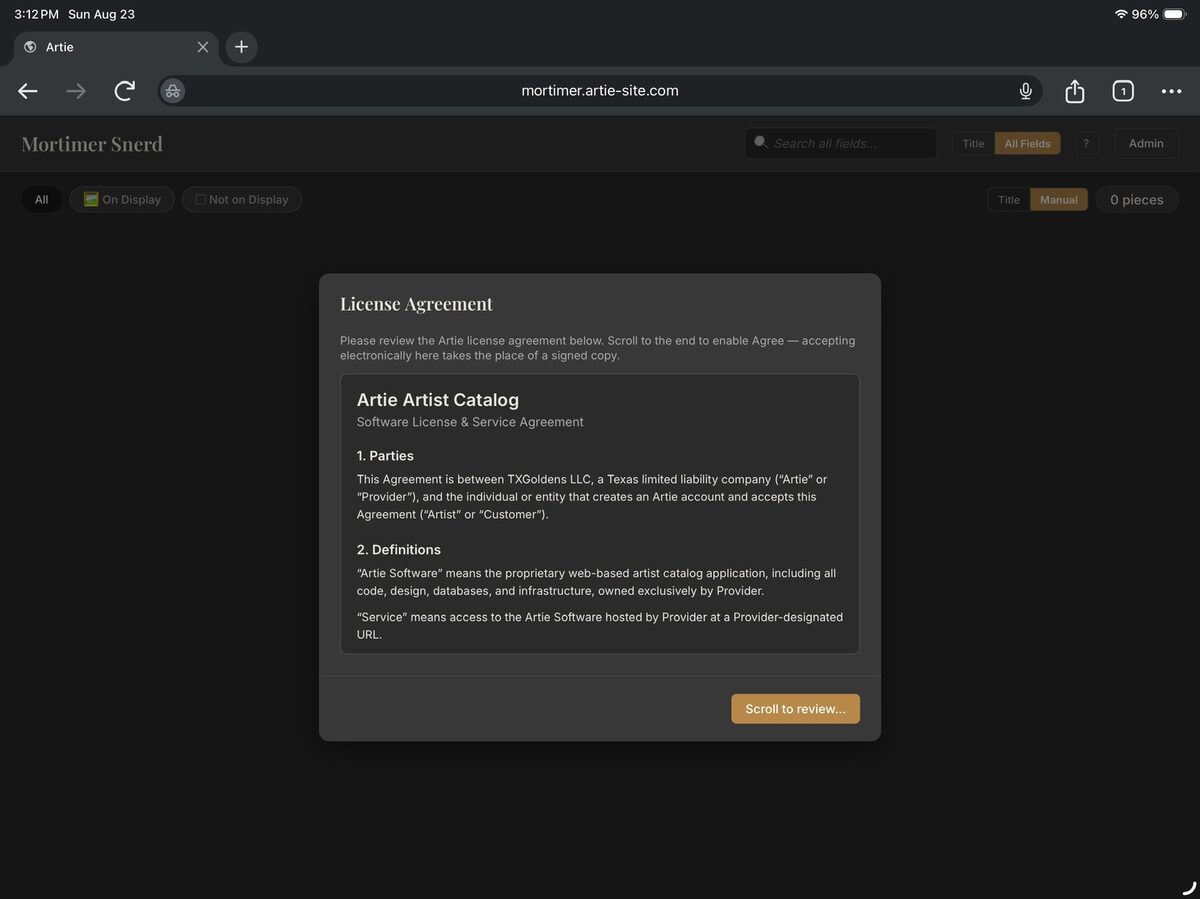
Artie License Agreement dialog, scrolled to the top
2
Once you reach the bottom, click I Agree to accept electronically.
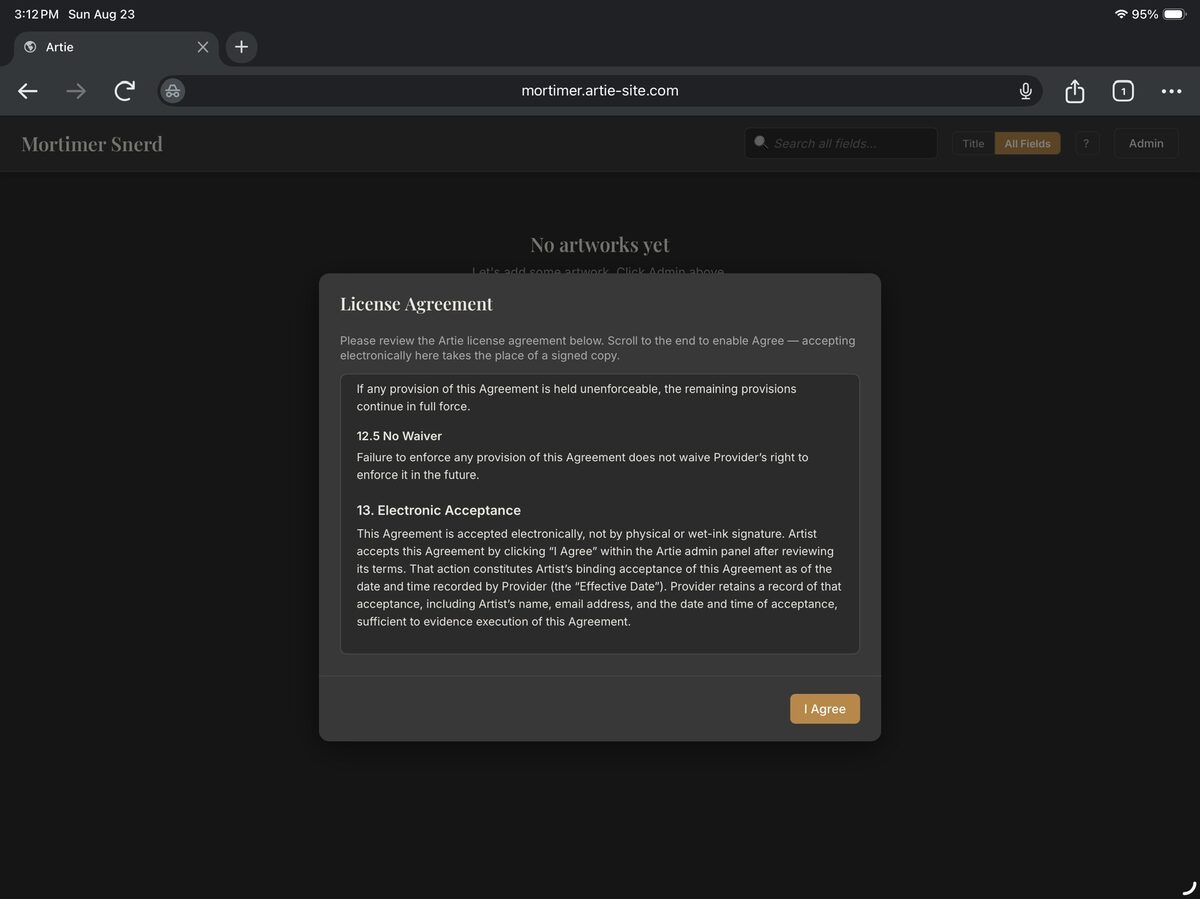
Artie License Agreement dialog scrolled to the bottom with the I Agree button enabled
3
Next, set a personal password to replace the default one you were given.
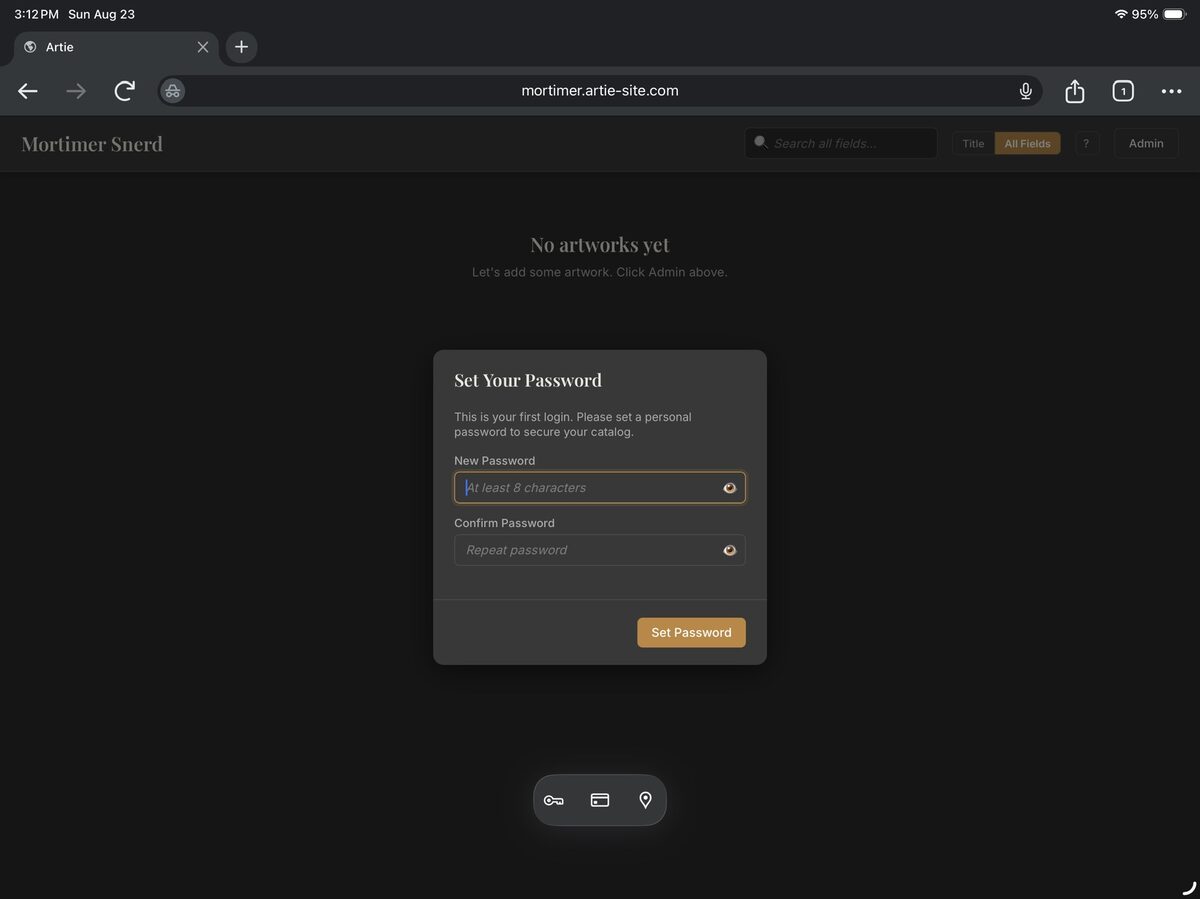
Artie Set Your Password dialog with empty fields
4
Enter your new password twice to confirm, then click Set Password.
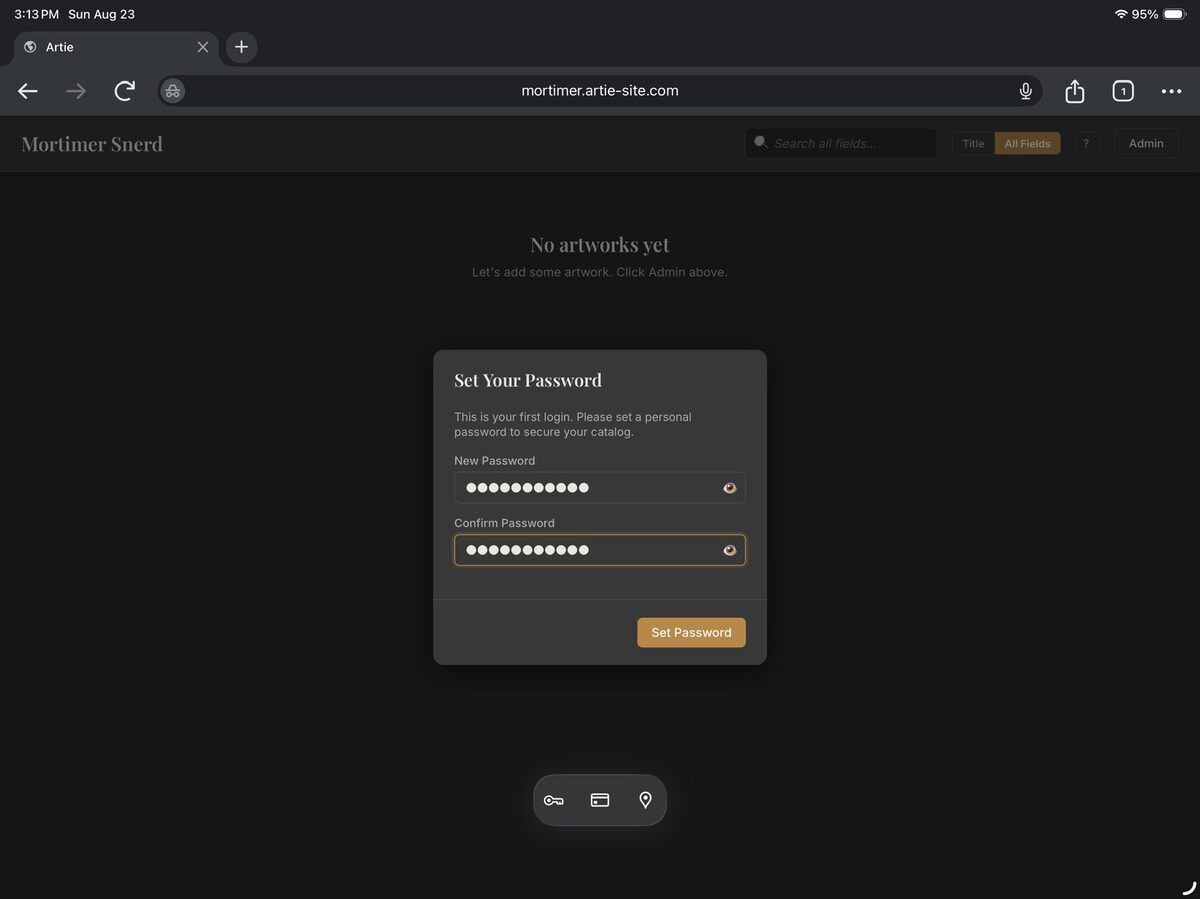
Artie Set Your Password dialog with both fields filled in
5
You're in! This is your admin toolbar — from here you can add artwork, adjust catalog settings, change your password, and update your viewer PIN.
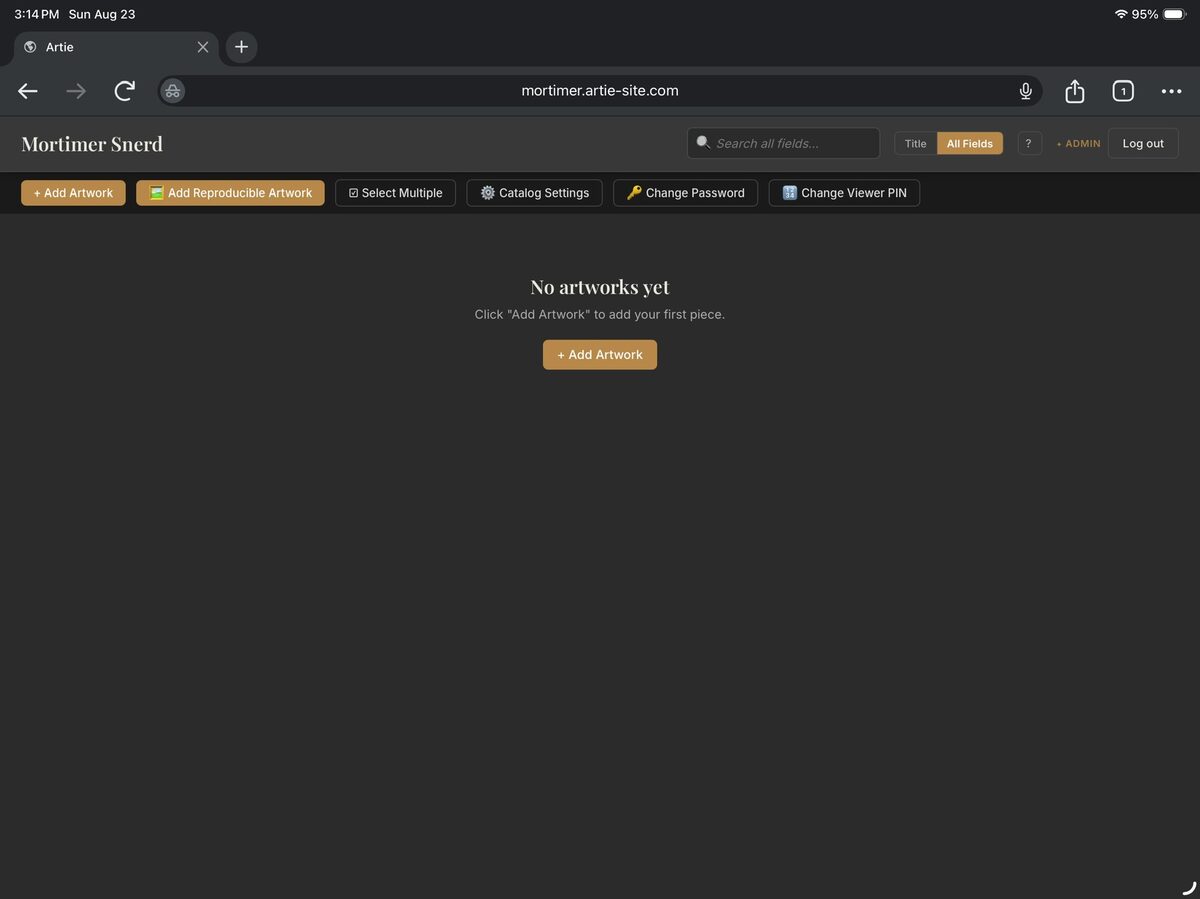
Artie admin toolbar with an empty catalog, showing Add Artwork and other admin buttons

Catalog Settings (in your admin toolbar) is where you shape your catalog's tags — Medium, Subject, and Style — and add custom metadata fields of your own.

1
Artie comes with a starter list of common tags for Medium, Subject, and Style, plus a Display Options section for your thumbnail grid. Turn on the ones that fit your work with Disable/Enable.
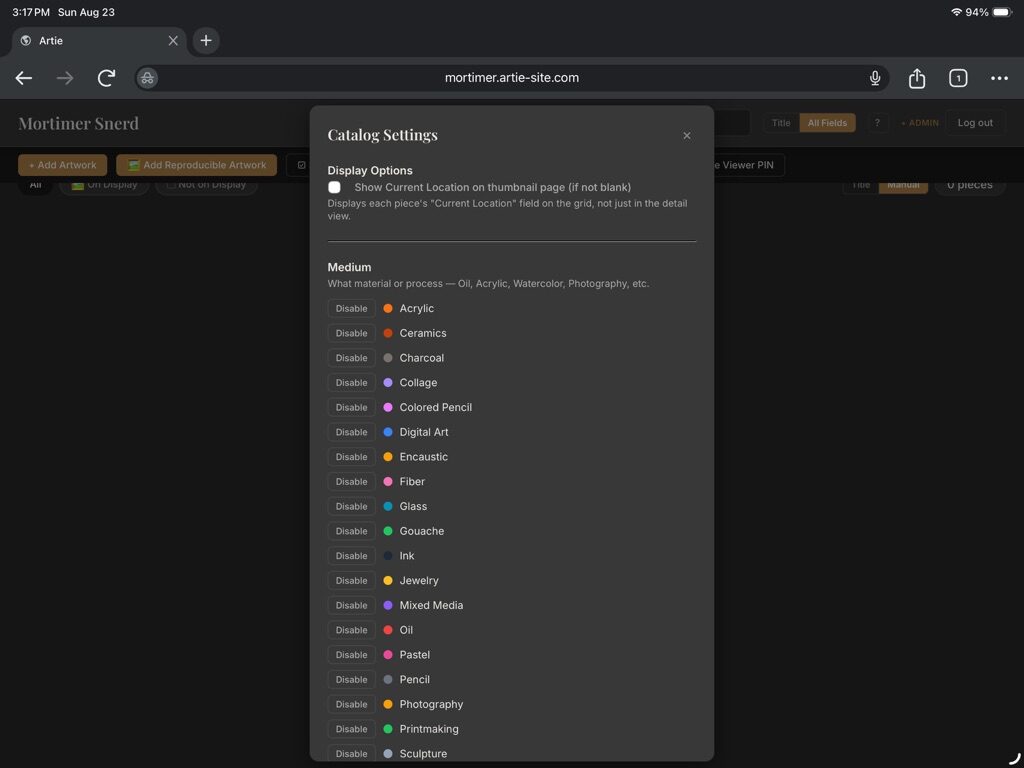
Artie Catalog Settings dialog showing Display Options and the Medium tag list
2
Don't see a Medium you need? Type a name, pick a color, and click Add to create your own.
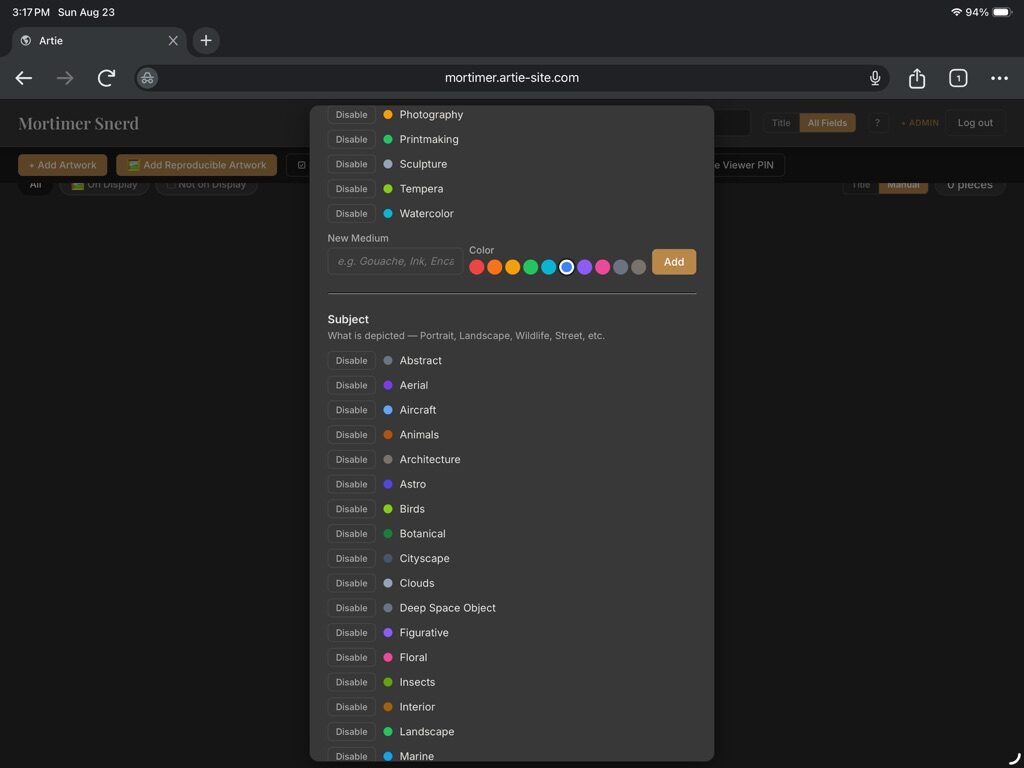
Artie Catalog Settings New Medium form with a color selected, and the start of the Subject tag list
3
Same idea for Subject — what's depicted in the piece. Add as many as your catalog needs.
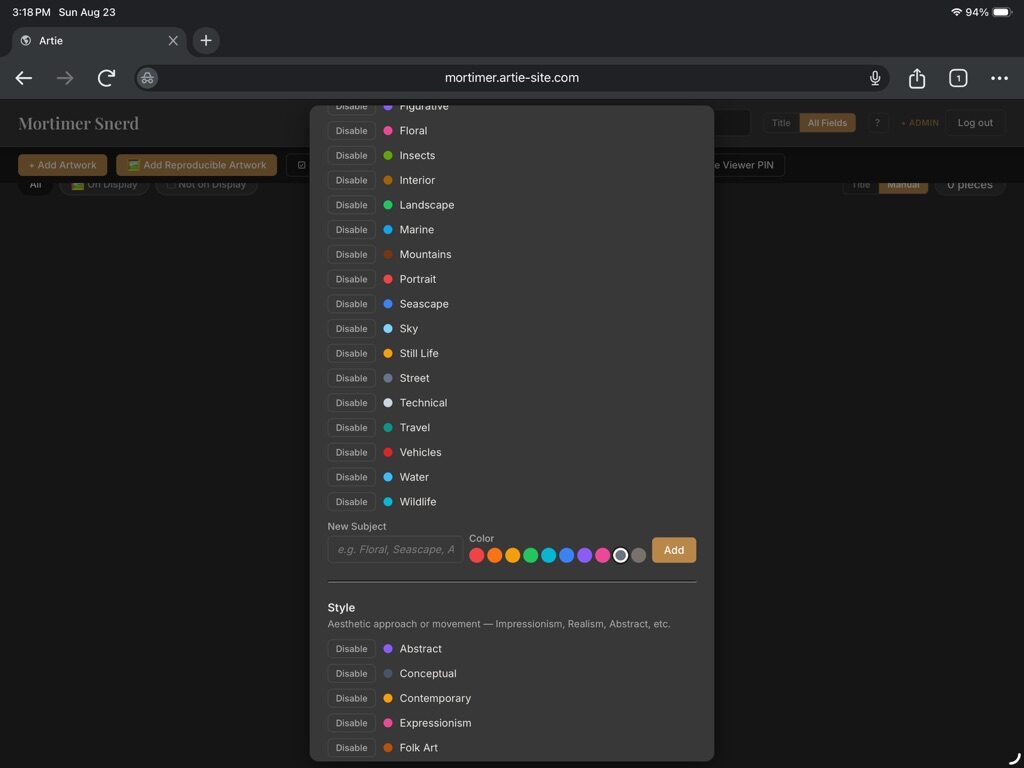
Artie Catalog Settings New Subject form, with the Subject tag list above it
4
And Style, for aesthetic approach or movement. Further down, Custom Metadata Fields let you add your own fields beyond title, size, and medium — text, number, date, URL, or a dropdown of your own options.
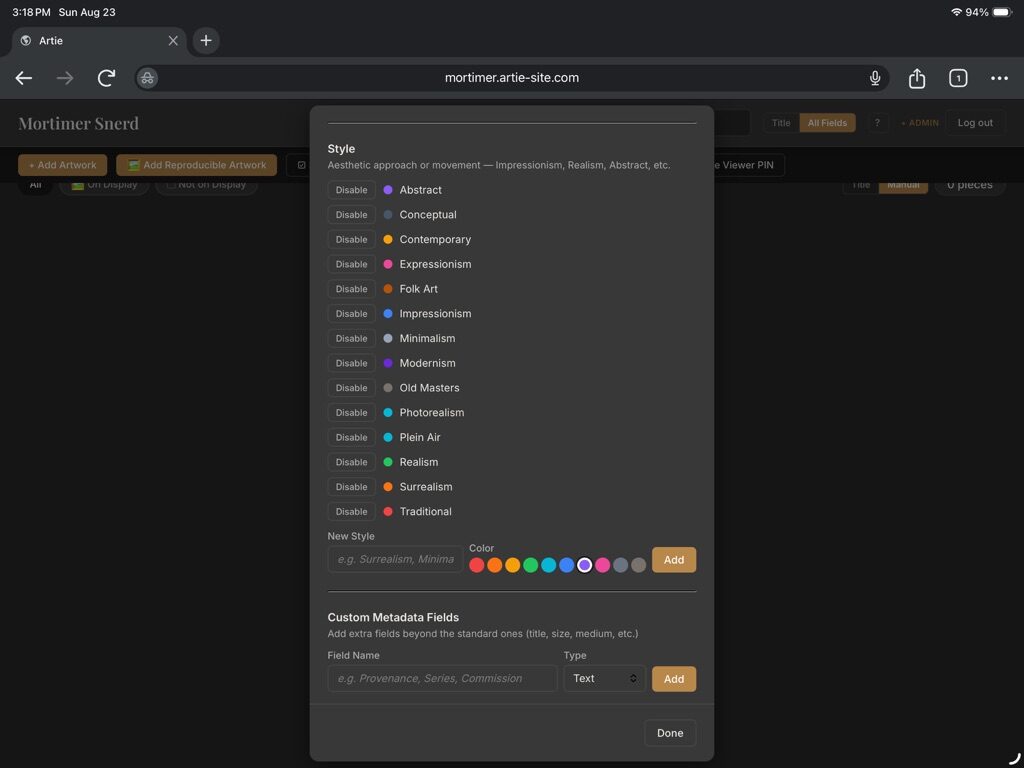
Artie Catalog Settings New Style form and the Custom Metadata Fields section below it

Photographs and other reproducible work — anything you might print or sell in multiple copies — go through Add Reproducible Artwork. (One-of-a-kind pieces use the plain Add Artwork button next to it.)

1
Click Add Reproducible Artwork to open the form. Size, price, location, and availability are tracked per print afterward, so this first pass just covers the basics.
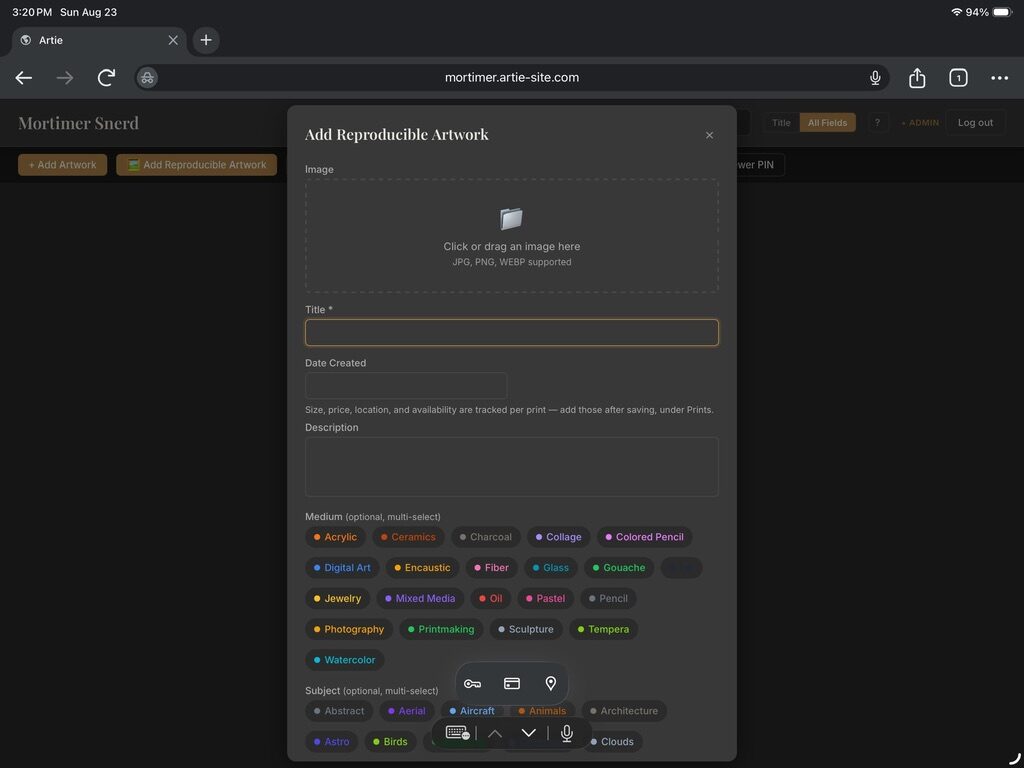
Artie Add Reproducible Artwork dialog, empty, with Image, Title, Date Created, and Description fields
2
Click or drag in an image, then fill in the Title, Date Created, and Description.
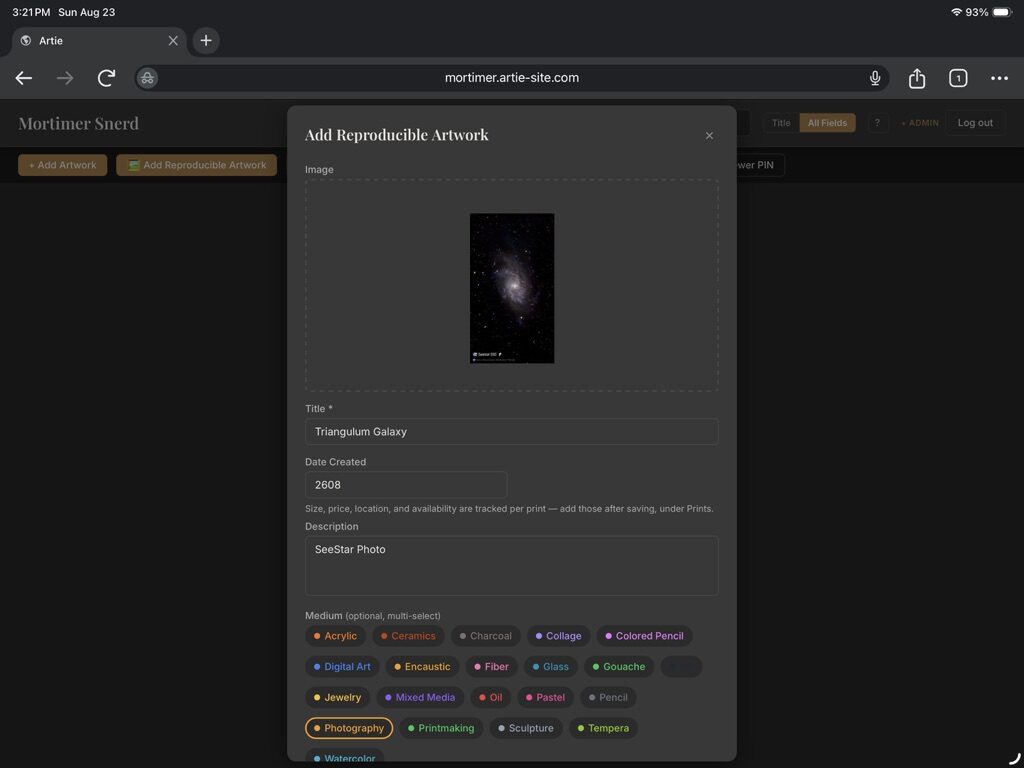
Artie Add Reproducible Artwork dialog with an image uploaded and the Title, Date Created, and Description fields filled in
3
Scroll down to tag it — Medium and Subject are both optional and multi-select, so pick as many as apply.
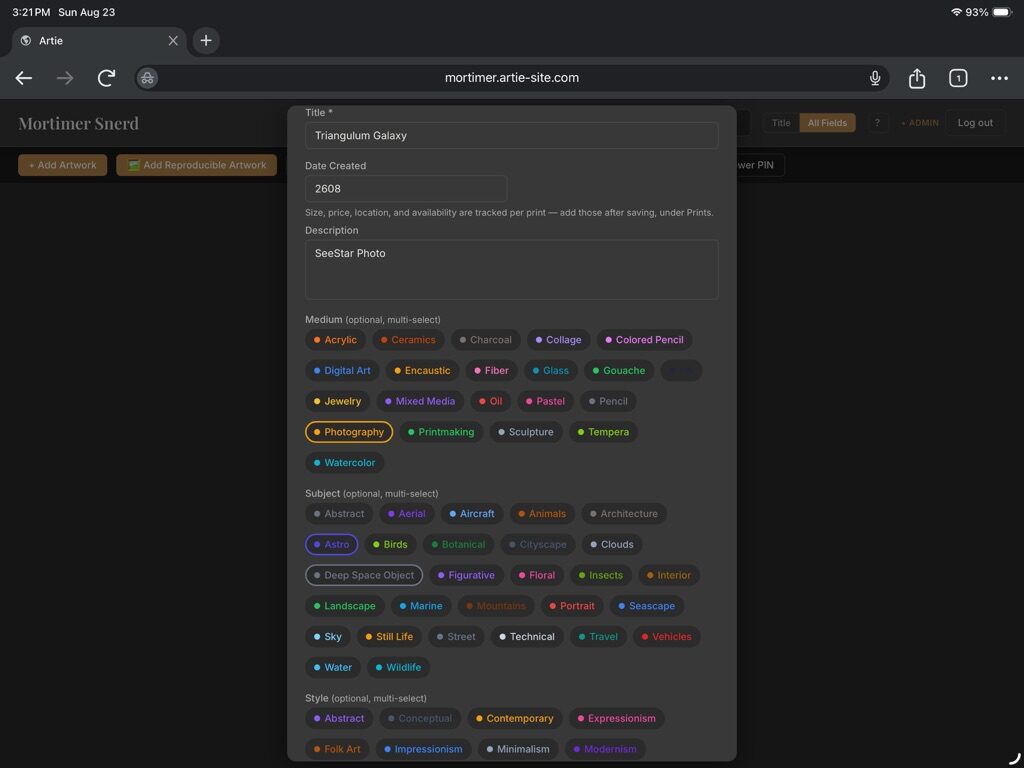
Artie Add Reproducible Artwork dialog with Photography selected under Medium and Astro selected under Subject
4
Add any Style tags too, then click Add Reproducible Artwork to save it.
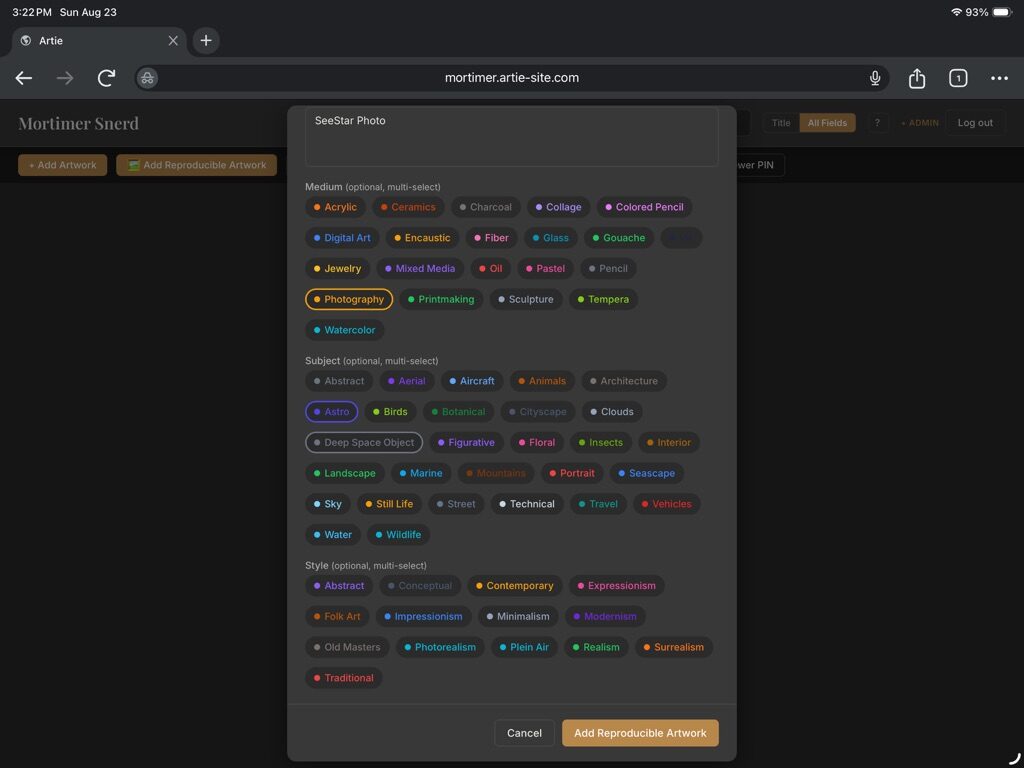
Artie Add Reproducible Artwork dialog scrolled to the Style tags and the Add Reproducible Artwork button
5
Your piece appears in the catalog grid, with its tags shown right on the card.
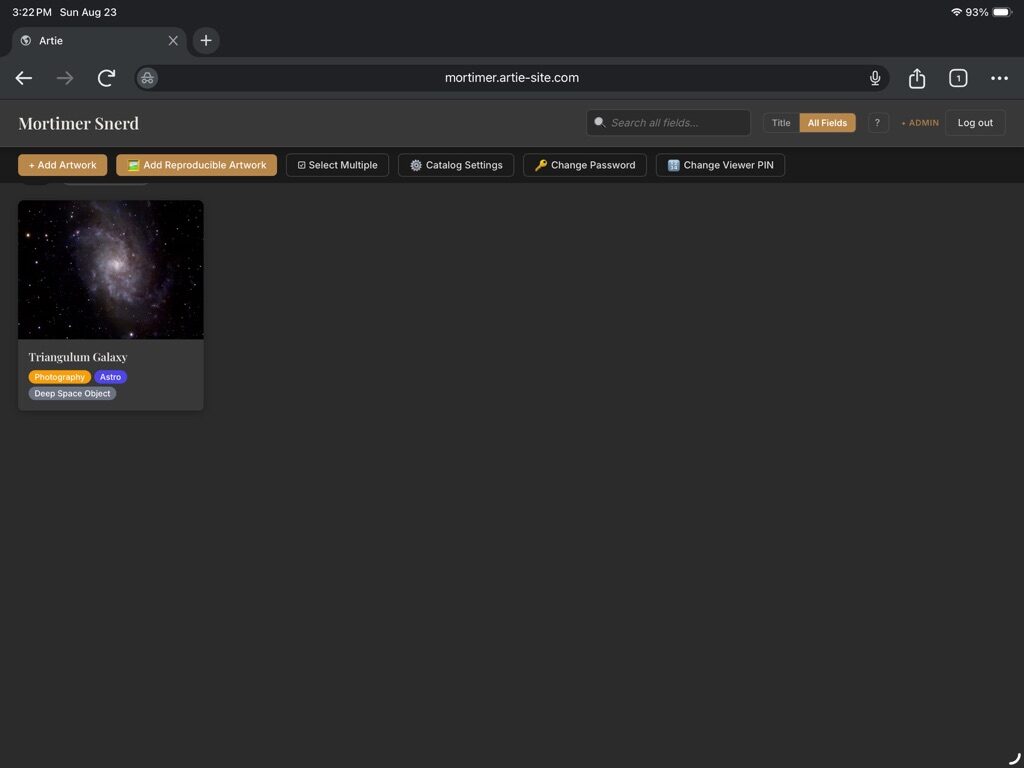
Artie catalog grid showing the newly added Triangulum Galaxy artwork card with its tags

Most of the searchable text in Artie — dates, display history, titles — lives in plain free-text fields. That's good news and bad news: good news because you can put whatever you want into a field, bad news because you need to be careful and consistent about how you enter it.

Search only matches what you actually typed

Artie's search looks for the exact text you enter, not what it "means" — so two ways of writing the same thing won't find each other.

1 January 2026won't match1/1/2026
First Placewon't match1st

Pick a format, then stick with it

For each kind of information you enter often — dates, display history, awards — settle on one way of writing it and use it every time. It doesn't matter which format you pick, only that it's consistent, so a search actually finds everything that matches.

One artist's system, as an example

Here's the convention one artist settled on for tracking pieces through their local art league's four seasonal shows a year:

FieldConventionExample
Display HistorySeason + 2-digit yearSpring26, Fall26
Creation DateMonth + year, no separatorMMYY (e.g. 0326 for March 2026)
League evolutionLeague initials + season + yearALFB Fall25
League showSame, with "Show" addedALFB FallShow26

That last pair is the key trick — adding "Show" is what tells an evolution and a show entry apart at a glance, and in search.

Don't worry about getting it perfect

If you type a slightly wrong string for a piece, no sweat — it's easy to go back and correct it later. The goal is a convention you can stay consistent with going forward, not a flawless catalog on the first pass.